Cleaning Your Computer, Part 3: Keyboards
Keyboards seem to be dust magnets (and hair magnets and staple magnets…). Even if you don’t immediately notice the junk accumulating in your keyboard, it has the potential to cause problems with the keyboard—and if you wait for years before doing it, you are likely to have some trouble getting the gook out. And, of course, it’s just disgusting, and a lot of us like to keep things clean.
Materials:
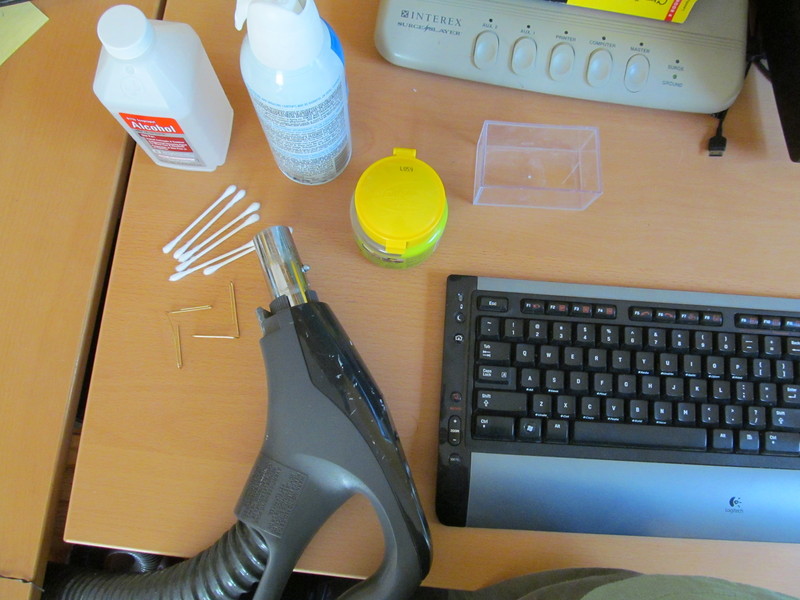
- A can of compressed air. This is used to spray air into the corners and loosen up dirt.
- Some newspaper (a trash can with a large opening works well too). You’re going to want to shake your keyboard upside down to dislodge some of the junk, and you probably don’t want it on your floor.
- A canister or handheld vacuum cleaner. If you have one, it will come in handy; if you only have an upright, you can do without it.
- Some Cyber Clean. Once again, it’s not mandatory, but it does come in handy.
- Two strong paperclips. If you need to remove key caps, this is the safest way to do it.
- Some rubbing alcohol, a bowl, and some Q-tips. These let you clean between the keys.
Warning about Compressed Air: Since I haven’t had you use compressed air yet, I should take just a moment to point something out: the stuff is not entirely normal air (it would be too expensive to pressurize normal air). While the pressurized chemicals are not dangerous if used normally, you should keep these guidelines in mind:
- Do not shake the bottle before using (unlike most aerosol products). This is because most aerosols are intended to come out as liquid, but compressed air is not. If you shake compressed air, the product will come out in its liquid form, which is so cold that it can discolor plastics and cause frostbite.
- Do not turn the bottle upside down. Once again, this will cause liquid to come out. Tilting it a bit is fine, but don’t go beyond 45 degrees.
- Do not attempt to inhale the contents. (Duh, but people do it.)
- As with any aerosol product, don’t spray it next to flames or in unventilated areas.
Step 0: Unplug the keyboard.
This isn’t difficult, but it is easy to forget.
Step 1: Spray compressed air to loosen dust.
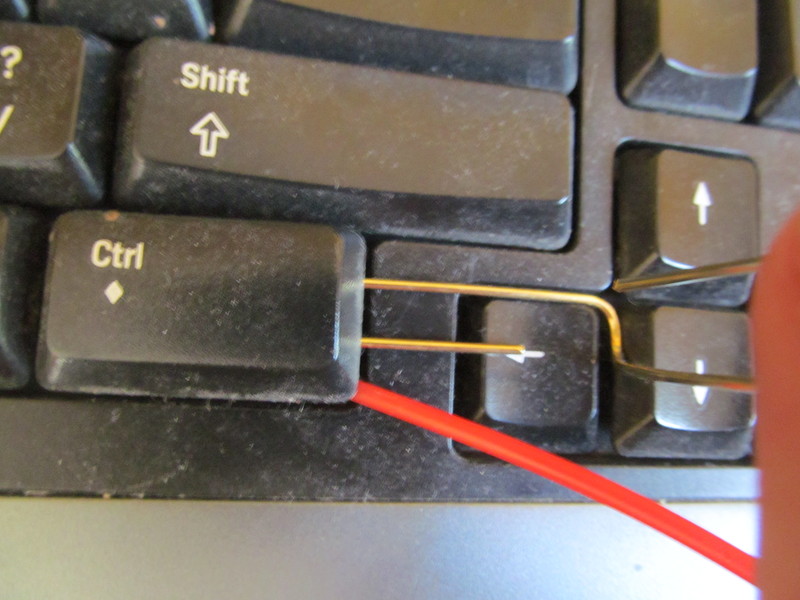
Lift up the Ctrl keys, the tilde key, and the backspace key at the corner and spray some compressed air in (using the little flexible nozzle that usually comes taped to the side of the bottle). Depending on your keyboard, you may need to use a bent paperclip to lift the corner enough to get the nozzle in. This can be a bit of an art at times: sometimes you have to start lifting up the key on a different side than you actually need it lifted and then slide around the edge of the key.
(To get this paperclip shape, just take the central loop and pull it outwards until the angle looks right.)
Step 2: Remove excess loose dust.
Take the keyboard outside or over some newspaper or a large trash can, flip the keyboard upside down, and shake it vigorously. Good whacks on the bottom don’t hurt.
Step 3: Vacuum.
Spray the compressed air in the corners again, then get your vacuum cleaner. (You must plug in the vacuum cleaner before it will work, as I apparently forgot…) If you have the crevice tool handy, that works the best. Push down one row of keys and vacuum toward the gap, then repeat the other way.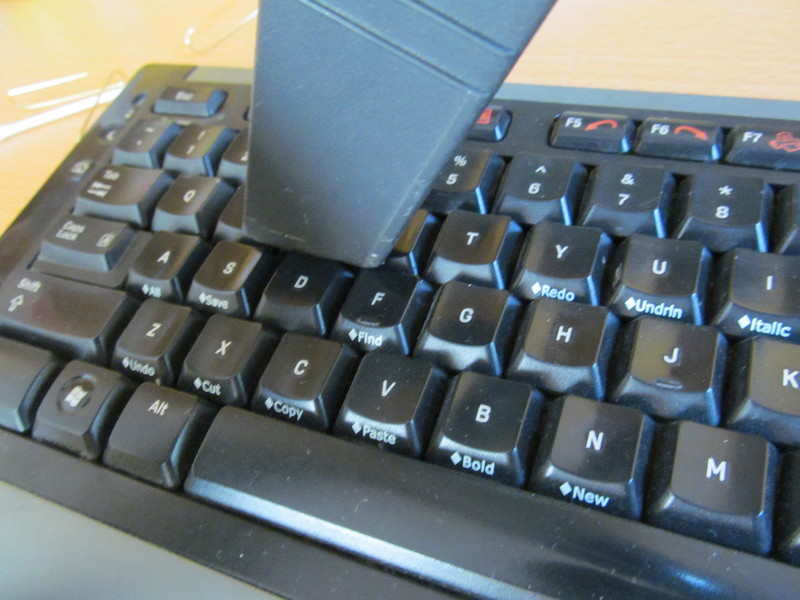 When you’re done, spray compressed air, vacuum, and shake upside down again. If you don’t have an appropriate vacuum cleaner handy, you can skip this step; using a liberal amount of compressed air and shaking makes a decent substitute.
Step 4: Use Cyber Clean.
If you have some, use it. If you’ve never used it before, it’s easy: just pull it out of the container, stick it on top of your keyboard, and squish it into the spaces.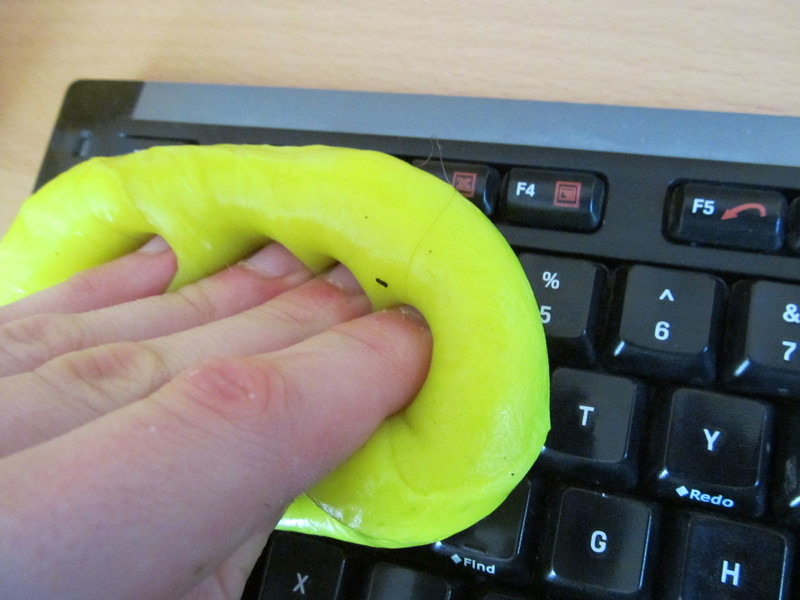
Step 5: Clean the spaces between keys.
If you didn’t use Cyber Clean or the spaces between the keys still look dusty and/or grimy, moisten a Q-tip with rubbing alcohol and clean between rows. Hold down one key to clean the facing key’s side, then switch to get the other (just like you did with the vacuum cleaner).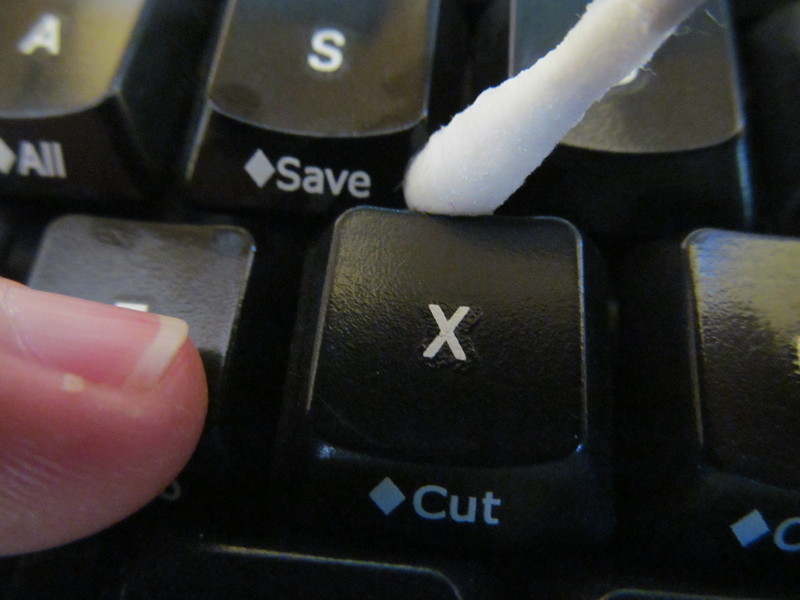 (Incidentally, this picture was nearly impossible to get, since I only had two hands. It took me four tries and hurt my fingers.)
Step 6: Remove key caps (optional).
Unless your keyboard is really dirty (which it probably is if you’ve never cleaned it before), you should probably skip this step. You should minimize the number of times you pop off the caps, as every time is another opportunity for something to break. If you haven’t cleaned your keyboard in five years or it’s noticeably gummed up, though, it’s worth the bother. (If you’re not sure, try popping off a cap in the middle first, like the ‘h’ key. If it looks reasonably clean underneath, you’re probably good. Also, here’s a picture of what it looked like under the caps after I cleaned using every other step; before it was utterly filthy and filled with dust, although I neglected to take a picture.)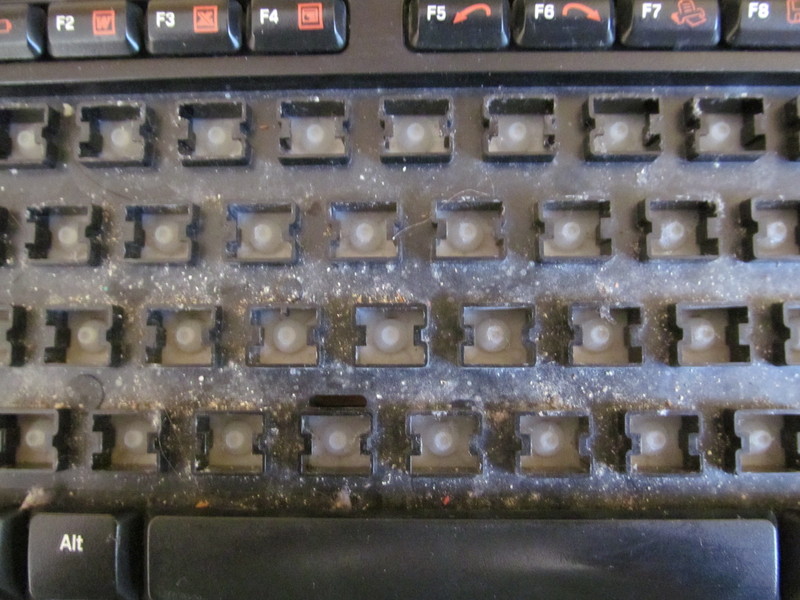 Before you begin, take a picture of the keyboard. You may laugh now, but chances are very high that when you go to put the caps back on, you’ll be glad you did—it’s surprisingly difficult to remember exactly where all the keys go, even if you’re a good typist like I am.
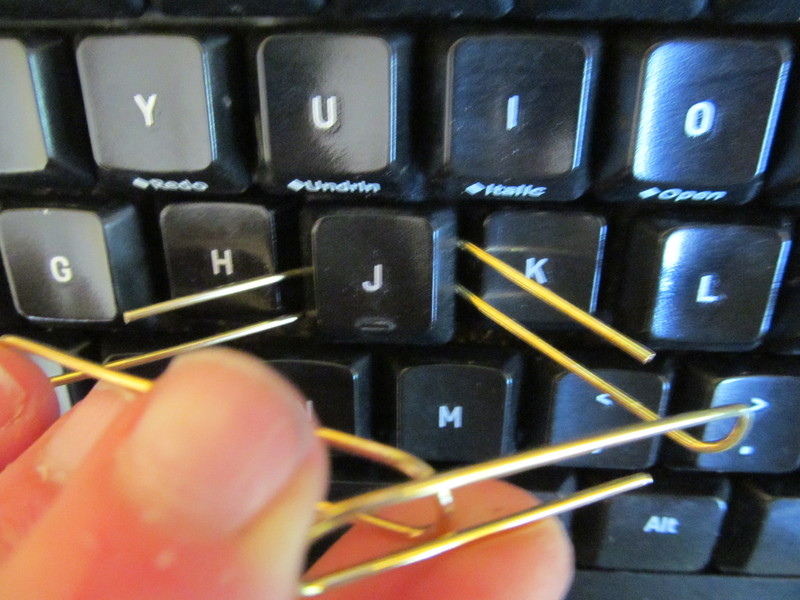
Don’t remove long or oddly-shaped keys like the spacebar, shift keys, or return key unless absolutely necessary—many of them have little bars, multiple contact points, or other gimmicks that make them extremely easy to break and extremely difficult to get back on if you don’t break them (see the picture below). Most of the time you can do an acceptable job by removing the rest of the keys and then cleaning under the keys you didn’t remove.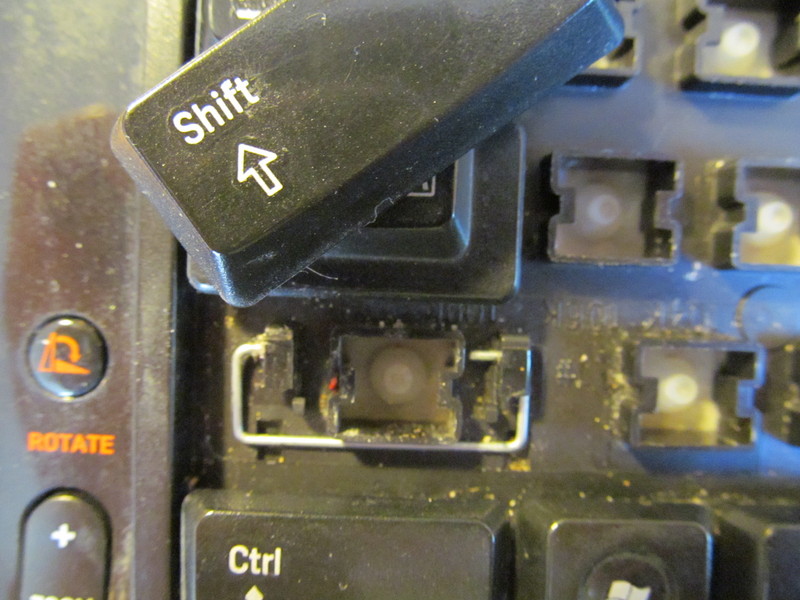 To actually remove key caps, take the two bent paperclips, stick one on each side, and pull them apart. If you happen to have a key cap puller, you can use it, but most people don’t (I actually do have one somewhere, but I couldn’t find it). Be careful when popping them off; most keys are made of pretty thin plastic and are easy to break accidentally.
  Once they’re all off, you can use any methods you want to clean the remainder of the junk out; I find Cyber Clean works especially well. You can also take this opportunity to wash the caps with soap and water; just make sure you dry them thoroughly before returning them to the keyboard.
When it comes time to replace the caps, place them in the appropriate place (making sure they’re not upside down, which is surprisingly easy to do with some letters like ‘H’) and push firmly on the very center of the cap until it snaps back into place.
Addendum: If you ever spill something on your keyboard…
- Immediately flip the keyboard upside down to prevent any more liquid from getting into it.
- Unplug the keyboard and remove the batteries (if applicable).
- If you spilled something sticky, get a glass of water and dump it on top of where you spilled your drink. Then flip it upside down again as before.
- Set a fan on your keyboard and leave it for a few hours. If you have air conditioning and it makes sense to use it, it can’t hurt to turn it on (it lowers the humidity).
- Plug the keyboard back into your computer and see if it works. If it works but it’s still sticky, follow these instructions to clean it up. (You’ll probably have to remove the key caps.) If it doesn’t work, you’re probably out of luck. If you have a laptop, the hard drive can probably still be salvaged (so you haven’t lost any data), and the keyboard can often be replaced for a fairly reasonable price if that was the only thing that was damaged.
